Summer time means outside time, especially after the long, cold, long, dreary, seriously-when-is-this-season-over winter we had. Once the sun started shining, we dropped everything we were working on inside and rushed to start on our outdoor to-dos...dropping still wet paintbrushes and leaving screwdrivers still spinning midair.
There were a few biggies on our outdoor list, and we knew we'd need to get going on those quickly to enjoy the results before fall rolls around. So, as with any project I do, or party, or redesign, I sketched out a little plan. I don't know what it is, but I must do this every time. I don't care what kind of software is available, or if I have 20 mood boards assembled, I MUST take a sheet of paper and sketch out the plan by hand. It's the only way I can really get it in my head enough to visualize every piece while I'm working through the project.
We knew we needed a patio STAT, so as soon as the last bit of snow melted, we grabbed some marker paint and some flags from Lowe's and drew out the shape we wanted and placed the flags. This would be necessary to get an accurate quote from any contractor. There was quite a bit of leveling to do to add a patio, which would require digging out a large section near the house, so we thought this was a project best left to the professionals. It would be terrible to spend lots of time and energy on this big diy only to end up with a not-so-nice finished result, or to have it crack after.
After placing the flags, we lived with it for about a week, tweaking the shape here and there-- and comparing it to my handy dandy sketch-- before finally calling it done and having the contractor come with his team to do their thing.
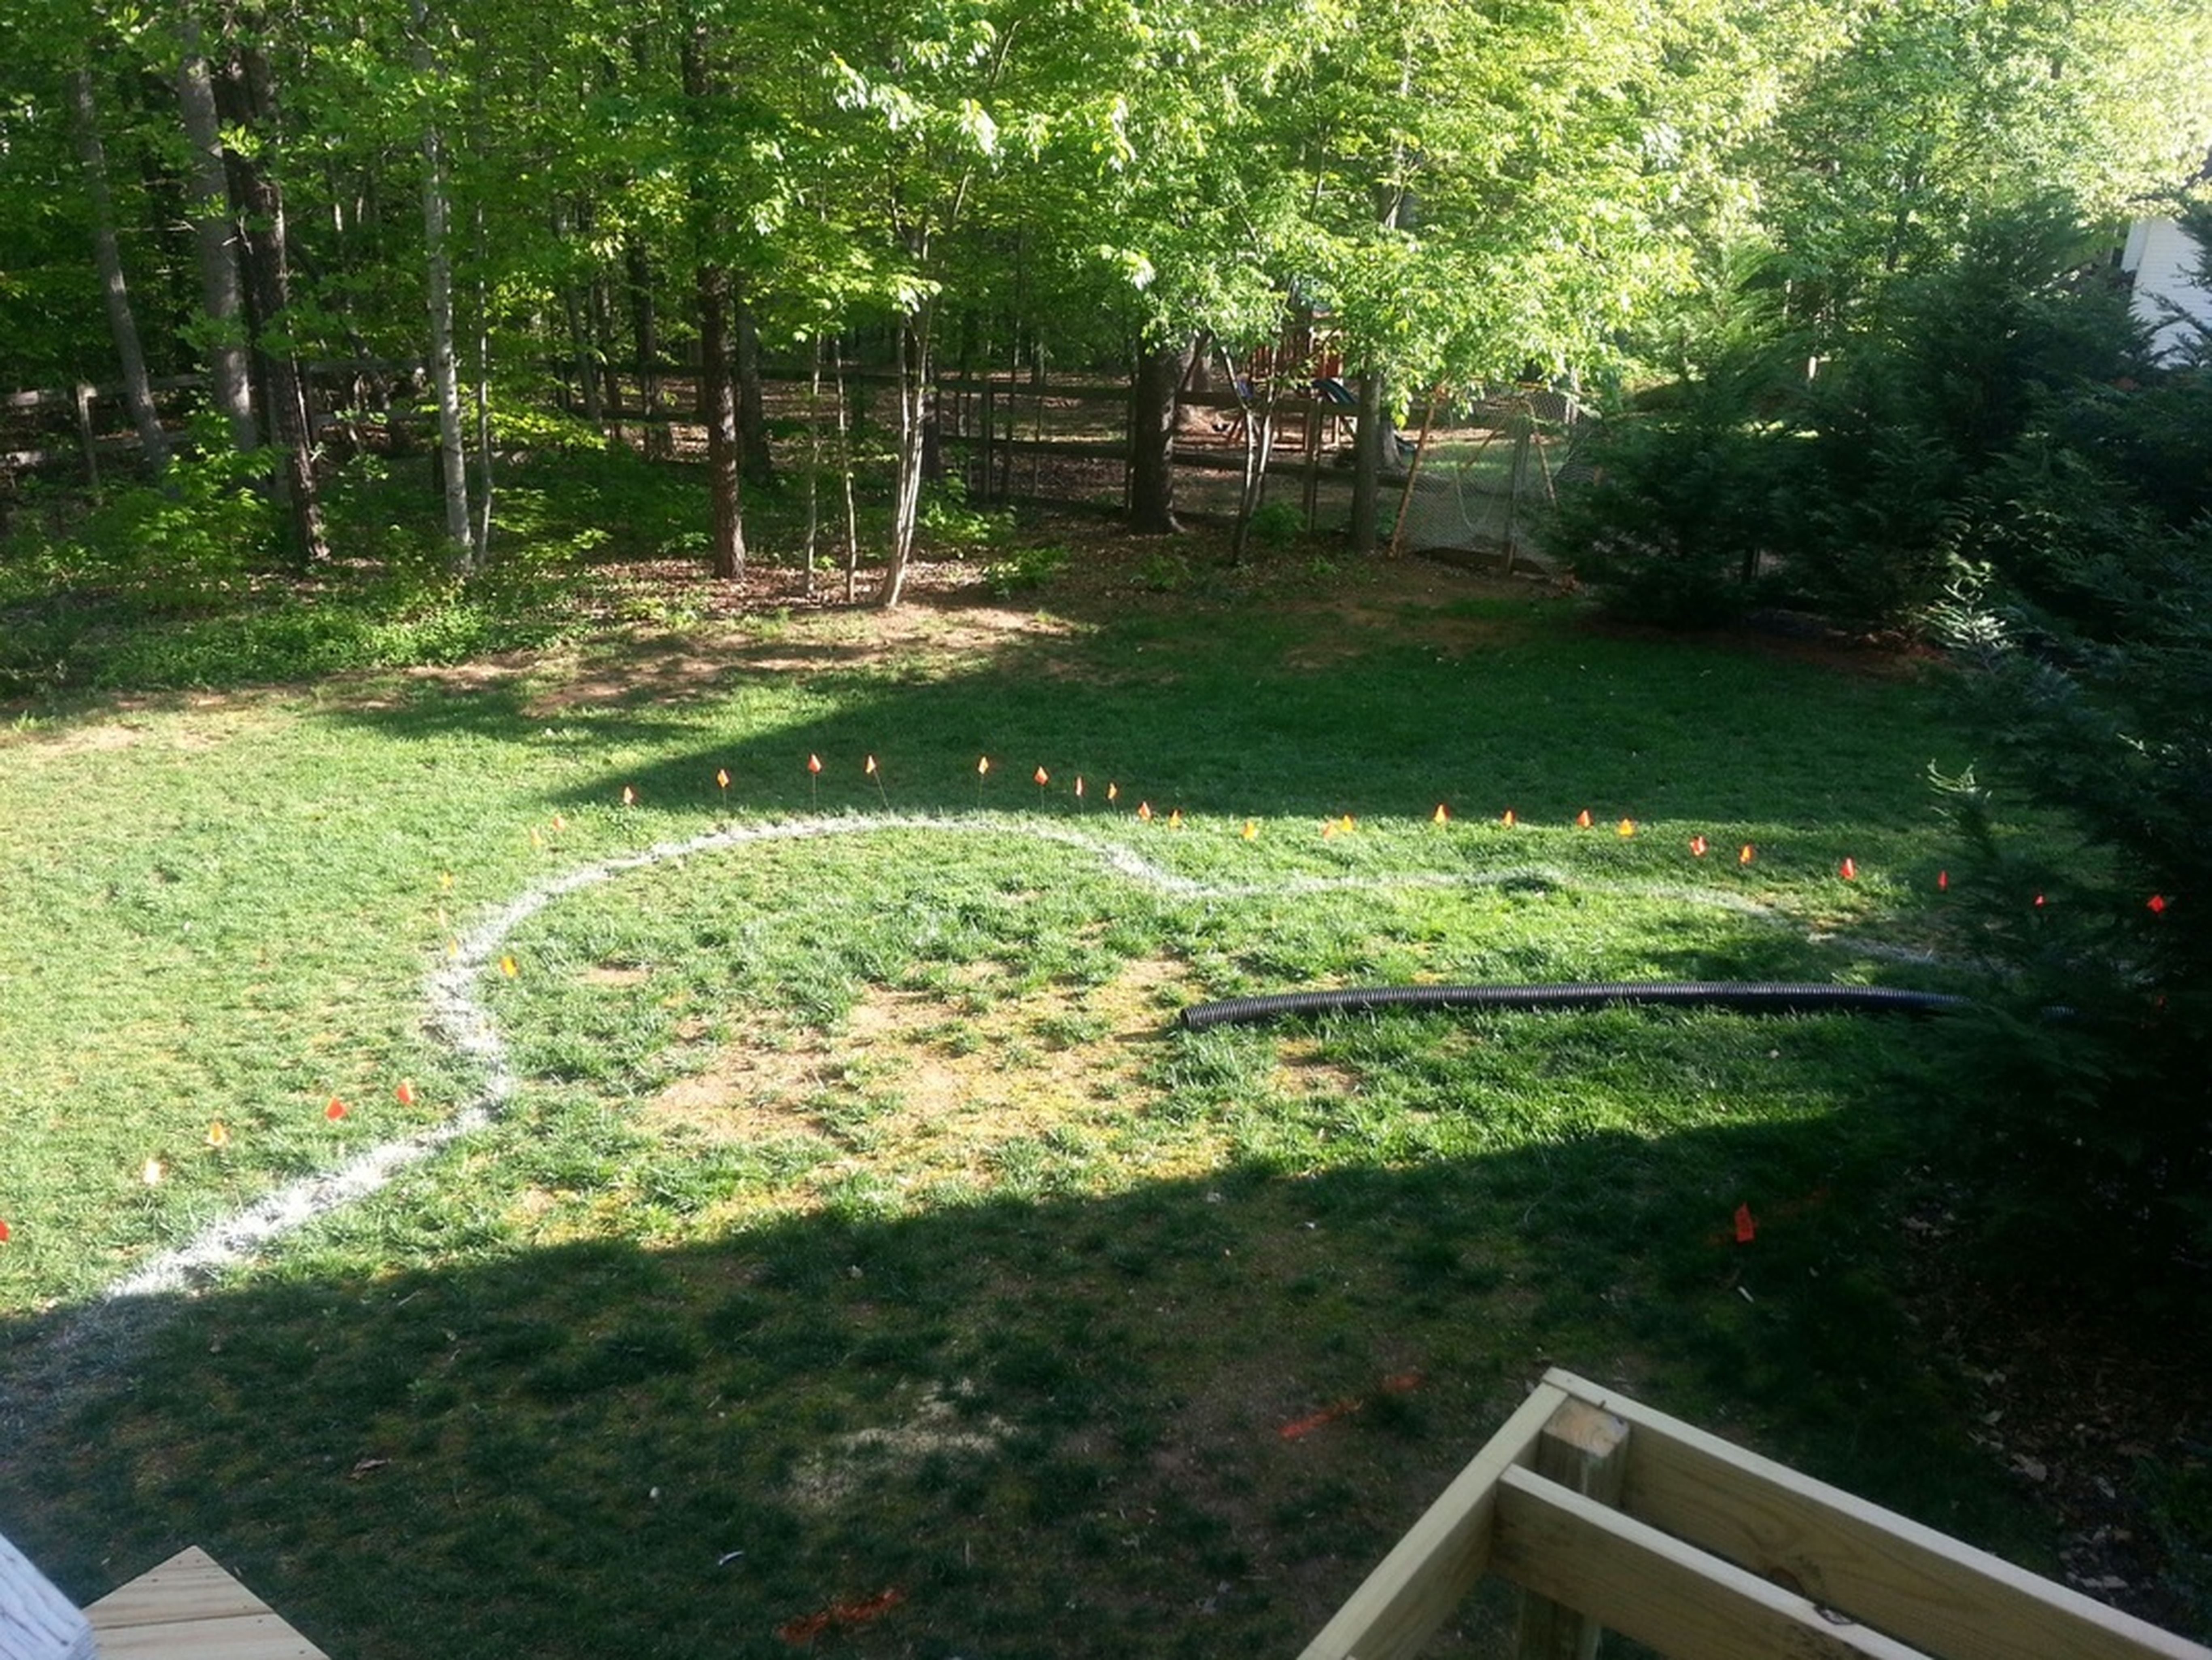
We also had him level out another area of the yard while he had the equipment there, and we had him move that evergreen shown on the far right in the pic above to a better spot in the yard.
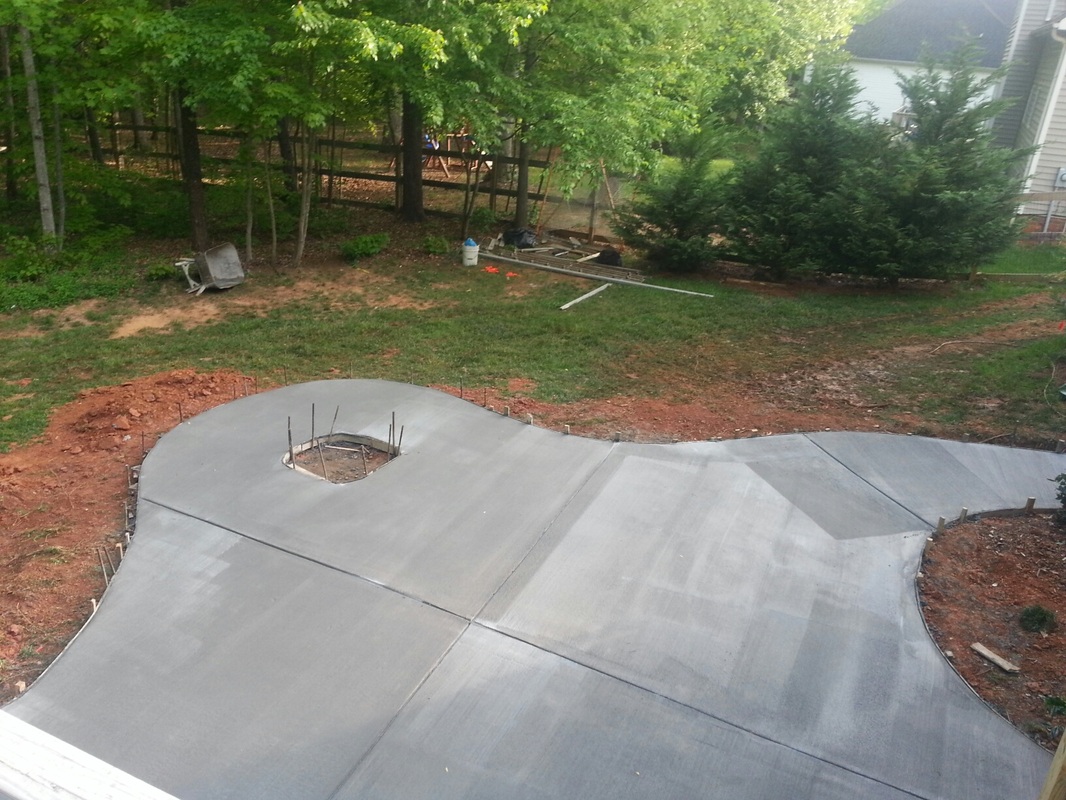
The contractor was done before we knew it, but the project was far from finished.
The contractor was done before we knew it, but the project was far from finished.
 | 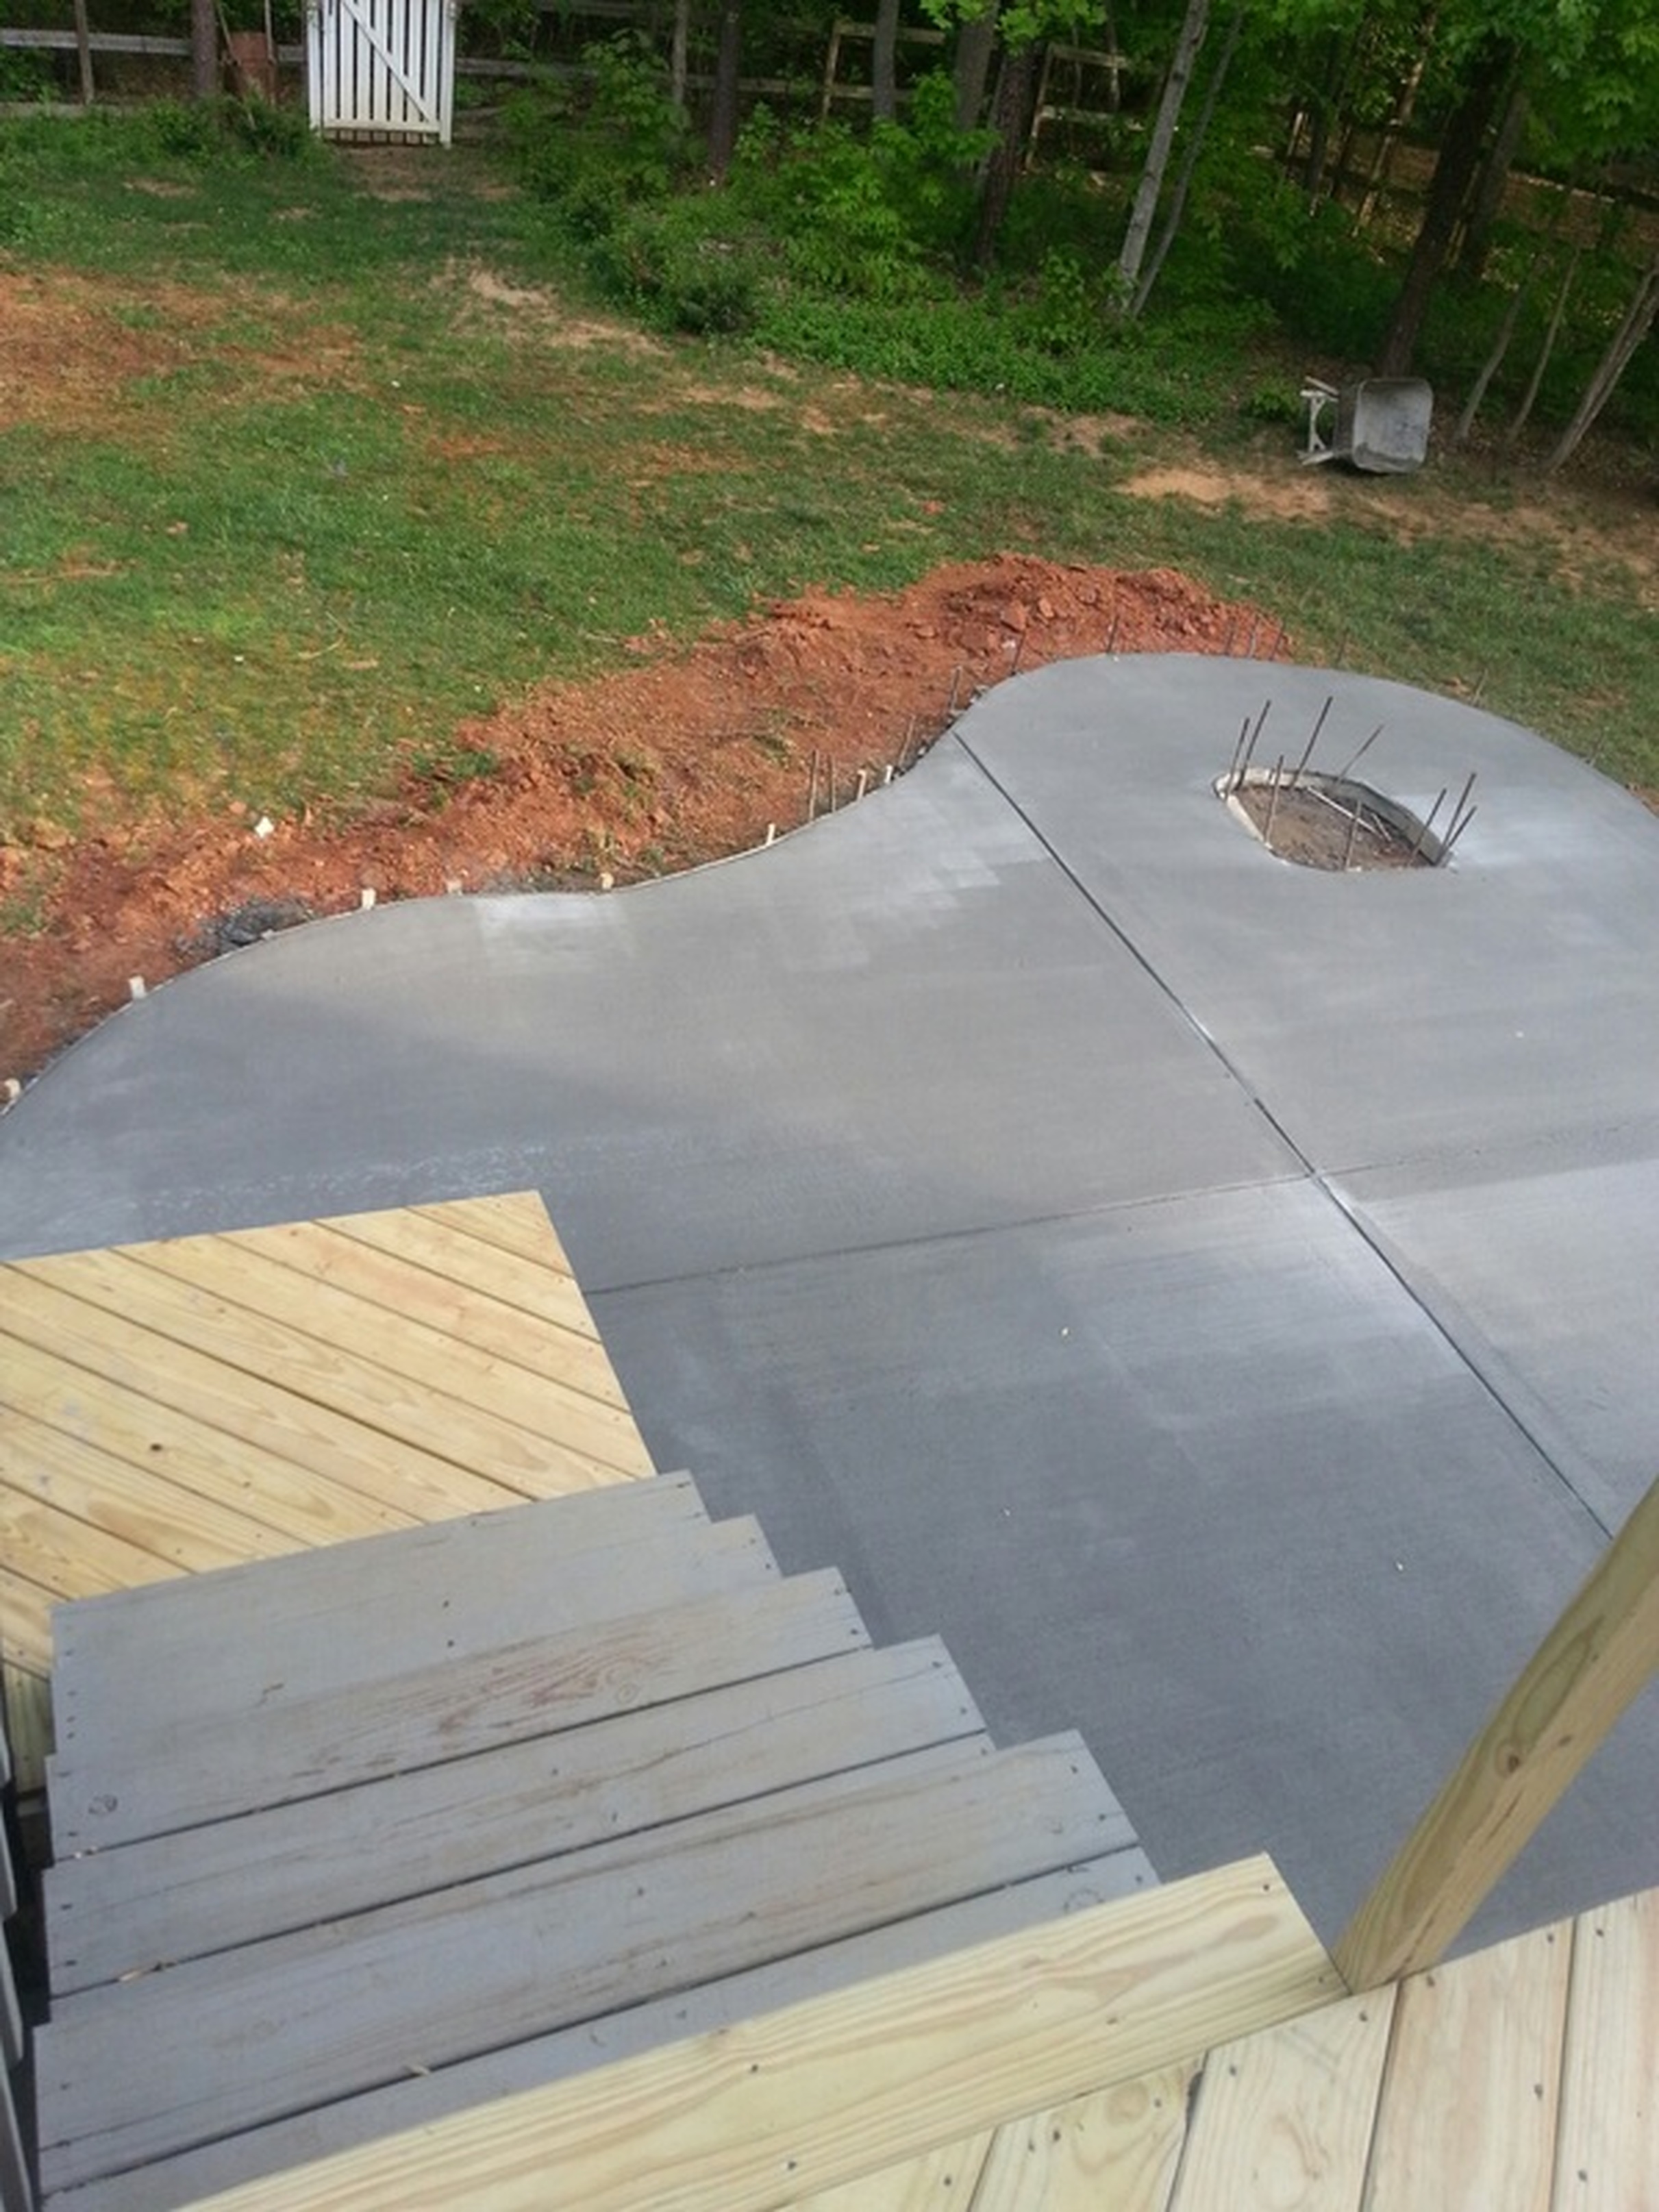 |
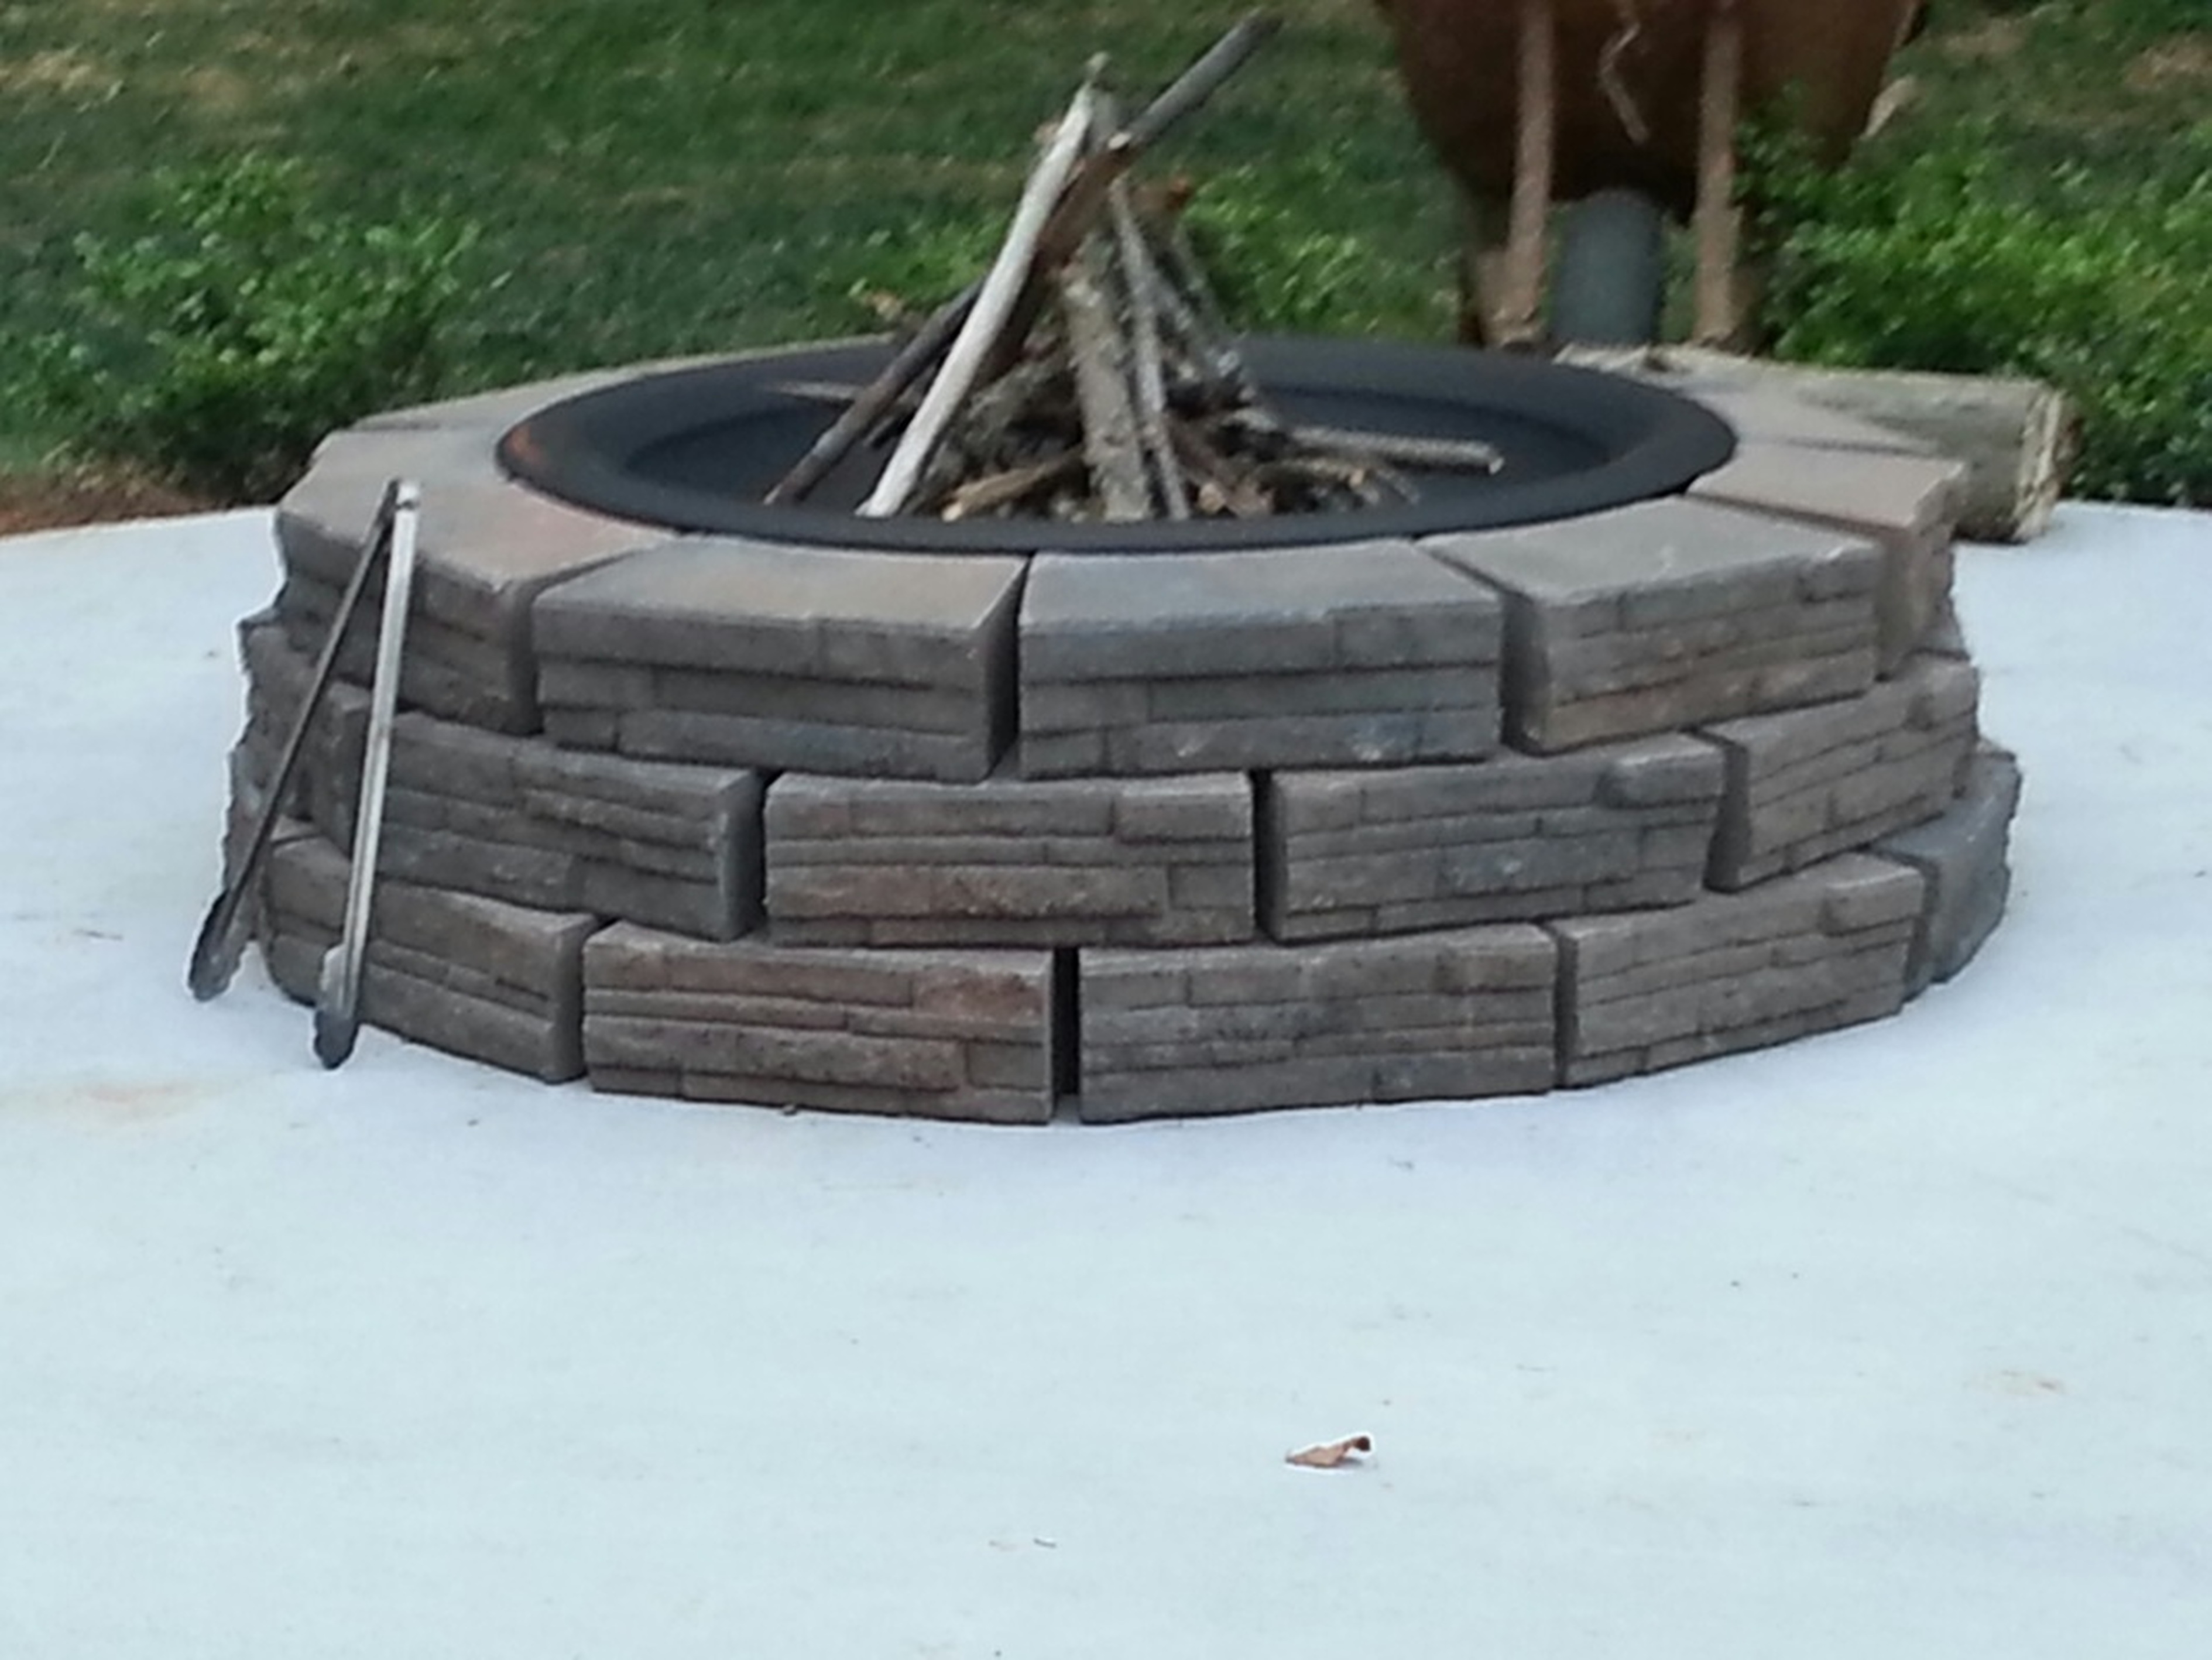
We had some work to do! We had our contractor leave a hole 3 feet in diameter for the fire pit, so while Vern finished up the stairs, I tackled this project. I selected the stacking stone from a pretty good selection offered by Lowe's, but I was able to pick up the steel ring/insert from Home Depot at a pretty good price.
I first poured in some drainage rock into the bottom of the pit, then arranged my first row of stone around the hole. I had to be careful to keep the gaps between each stone consistent while tweaking the shape. As I added layers, I staggered the joints, but also made sure to keep the spacing between each stone consistent while keeping the whole thing level at all times. Once all of the stone was stacked, I slid the insert into place, making sure the lip of the insert was centered up correctly to grab the stone. And then done! If you wanted, you could use masonry adhesive to secure each new layer of stone to the previous layer, but we were fine with doing a dry stack.
I first poured in some drainage rock into the bottom of the pit, then arranged my first row of stone around the hole. I had to be careful to keep the gaps between each stone consistent while tweaking the shape. As I added layers, I staggered the joints, but also made sure to keep the spacing between each stone consistent while keeping the whole thing level at all times. Once all of the stone was stacked, I slid the insert into place, making sure the lip of the insert was centered up correctly to grab the stone. And then done! If you wanted, you could use masonry adhesive to secure each new layer of stone to the previous layer, but we were fine with doing a dry stack.
Next up was the plantings. I had a couple of bushes to move around, and some perennials and annuals to add--both potted and planted--to dress up the patio a bit. This took a little more time and a LOT more elbow grease than the fire pit, but when it was done it was so worth it. The stairs were finished up at roughly the same time as this all came together. Sweet! We were high fiving each other for a week.
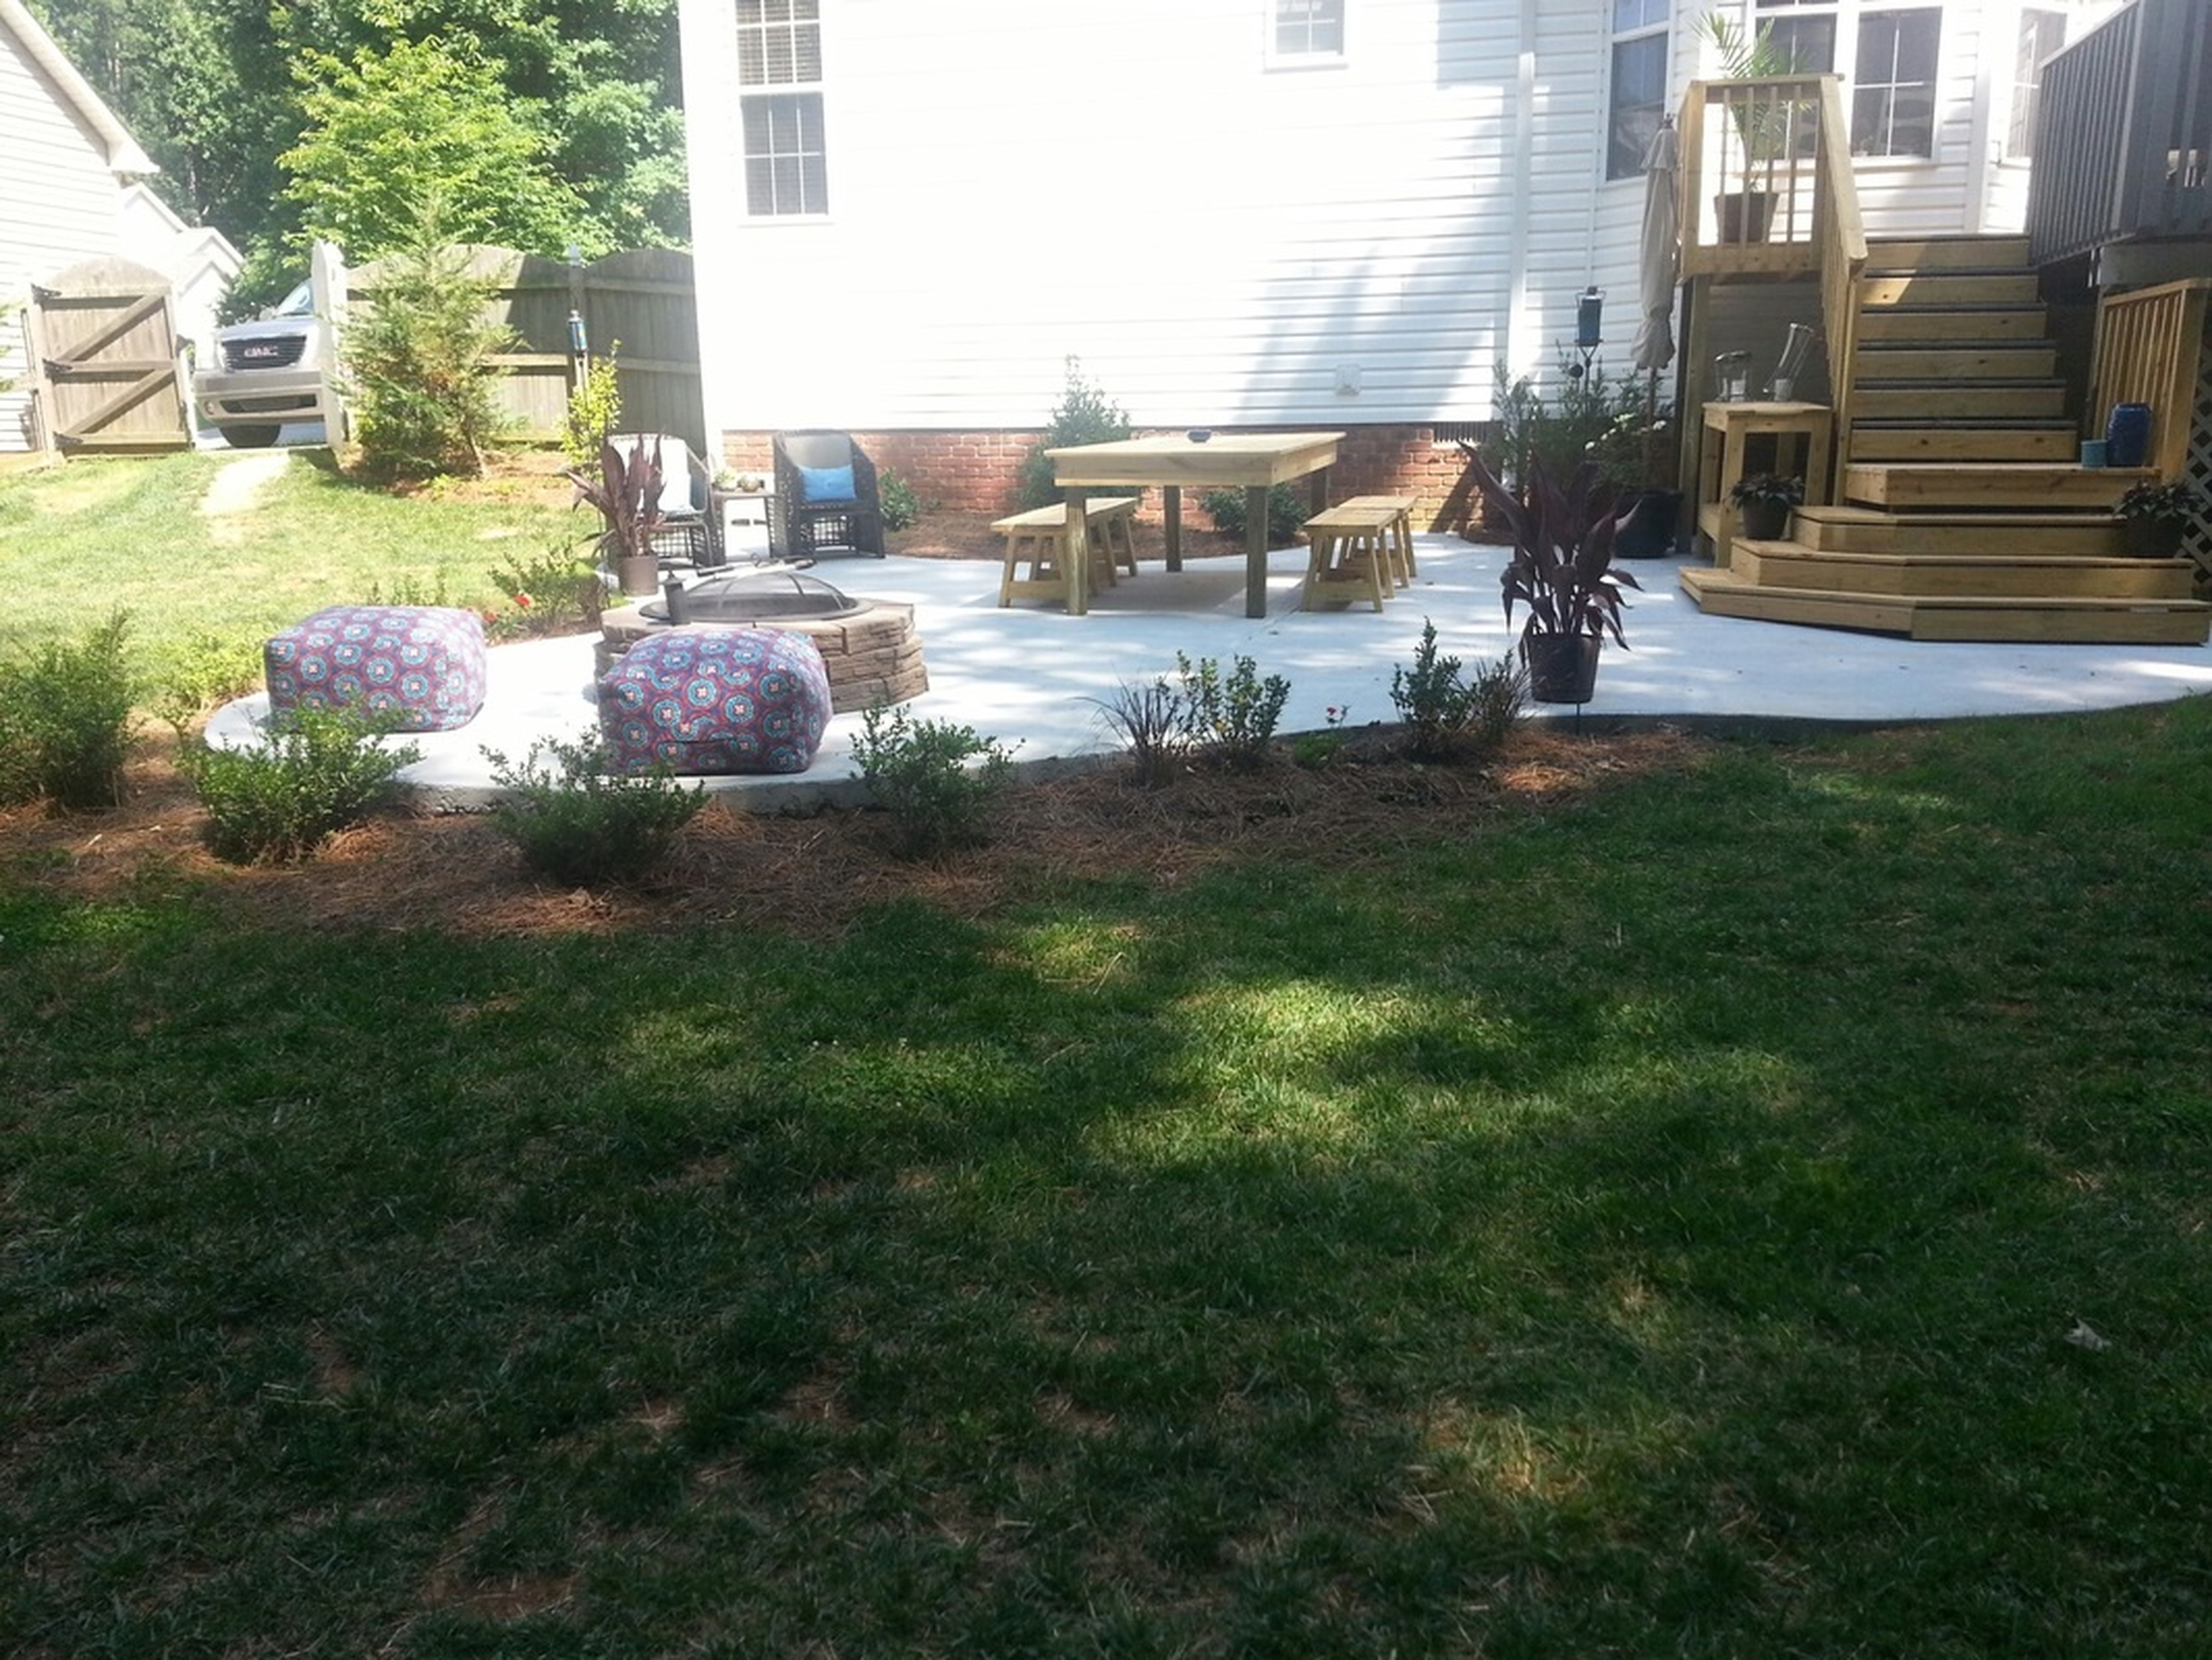
We've added a couple of pieces of furniture to the scene that Vern managed to knock out as well, including an extra large patio table with benches and a buffet. I'll share the detailed how-to on these two projects in an upcoming post. We'll finish these off with stain and paint once we're able to, but like the decking and stairs, we have to give it 30 days or so.
You'll also see that we replaced the evergreen that was up against the house with something a little smaller. We wanted something that would still be green through the winter, but something less bulky or leggy than the cypress. The holly we chose will work nicely and will provide some shade to the area (which gets full sun in the afternoon) as it matures.
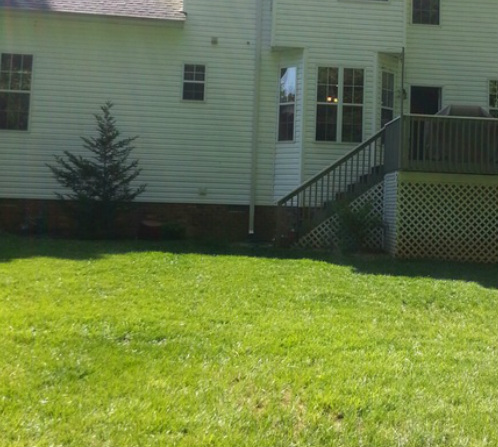
Here's this space before we went to work:
You'll also see that we replaced the evergreen that was up against the house with something a little smaller. We wanted something that would still be green through the winter, but something less bulky or leggy than the cypress. The holly we chose will work nicely and will provide some shade to the area (which gets full sun in the afternoon) as it matures.
Here's this space before we went to work:
And here's the space after:

We still have more to do, but this is a great start! We have another project out here currently under way that I hope to share with you next week. Stay tuned!

 RSS Feed