So, Ella and I got a little crafty over the weekend. We usually have a couple of hours on Saturdays and Sundays to spend doing something fun while Ethan takes his afternoon nap. This week I had some Christmas craft supplies ready to go, so we hit it up. She was super excited.
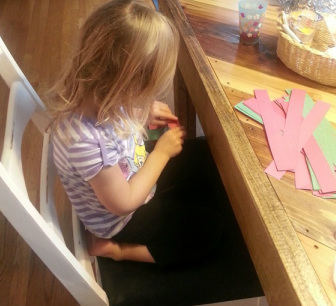
We started out with a tribute to my childhood. We went old school with a red and green paper chain. She did most of it herself (I did the cutting of the strips) and was very proud of her work. She was dancing and singing about it as we hung it in the play room.
We started out with a tribute to my childhood. We went old school with a red and green paper chain. She did most of it herself (I did the cutting of the strips) and was very proud of her work. She was dancing and singing about it as we hung it in the play room.

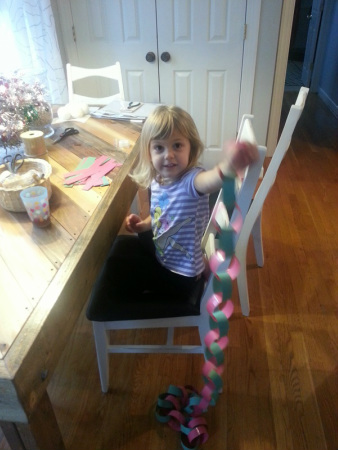
And yes, she's still in her pajamas. It was a rainy and cold Sunday afternoon. Don't judge.
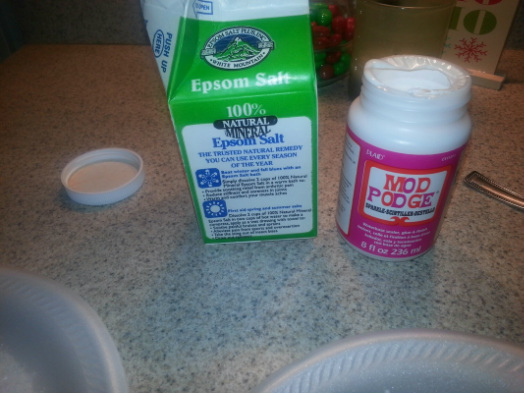
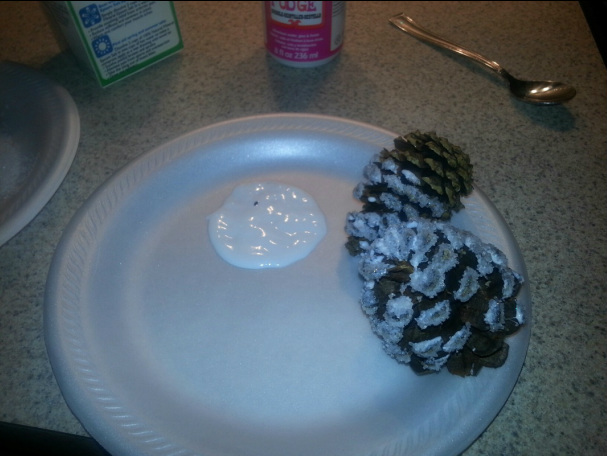
Next, we broke out the Mod Podge and brought a little sparkle into our day. We made snowballs and icy pine cones. SO EASY! Really.
Snowballs
Supplies:
Next, we broke out the Mod Podge and brought a little sparkle into our day. We made snowballs and icy pine cones. SO EASY! Really.
Snowballs
Supplies:
- Styrofoam balls (we used varying sizes)
- Mod Podge (we used the sparkle version)
- Epsom Salt
- 2 Paper
Plates - Toothpick
- Newspaper (or 3rd paper plate)
Instructions:
Step 1. Lay out the paper plates side by side.
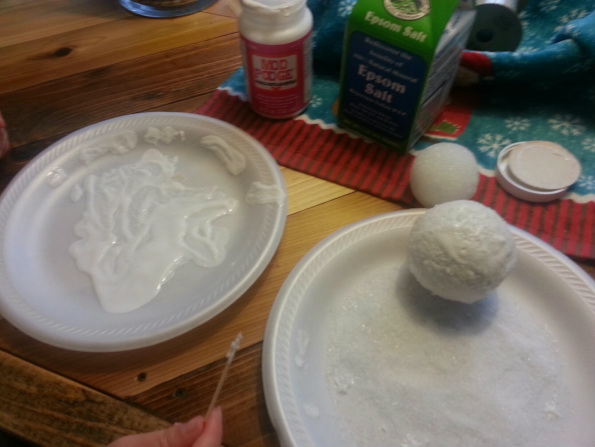
Step 2. Pour some of the Mod Podge onto one plate; pour some Epsom salt onto the
other.
Step 3. Roll a Styrofoam ball in the Mod Podge, making sure to cover completely. This is where the toothpick comes in, as you don't want your hands covered in Mod Podge.
Step 4. Roll the covered Styrofoam ball onto the plate with Epsom salt and roll it around, again until it is completely covered (and again using the toothpick to keep your hands salt free).
Step 5. Roll finished ball to a third plate or newspaper to dry completely.
Step 1. Lay out the paper plates side by side.
Step 2. Pour some of the Mod Podge onto one plate; pour some Epsom salt onto the
other.
Step 3. Roll a Styrofoam ball in the Mod Podge, making sure to cover completely. This is where the toothpick comes in, as you don't want your hands covered in Mod Podge.
Step 4. Roll the covered Styrofoam ball onto the plate with Epsom salt and roll it around, again until it is completely covered (and again using the toothpick to keep your hands salt free).
Step 5. Roll finished ball to a third plate or newspaper to dry completely.
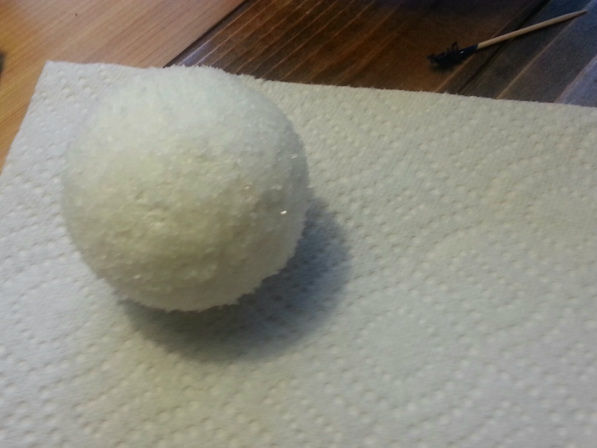
It looks just like a snowball! We put these in an old tin tub I have in the entry way alongside a little wooden sleigh (made by yours truly in 7th grade woodshop), and they look so great.
While we had all of the materials already out, we switched gears to work on some pine cones. Same method as listed above. Just dip the cone in the Mod Podge and then in the Epsom Salt. The end result is snowy/icy pine cones. Perfect for a holiday display!
While we had all of the materials already out, we switched gears to work on some pine cones. Same method as listed above. Just dip the cone in the Mod Podge and then in the Epsom Salt. The end result is snowy/icy pine cones. Perfect for a holiday display!
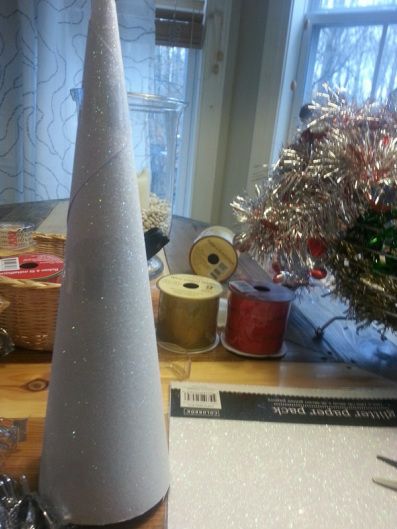
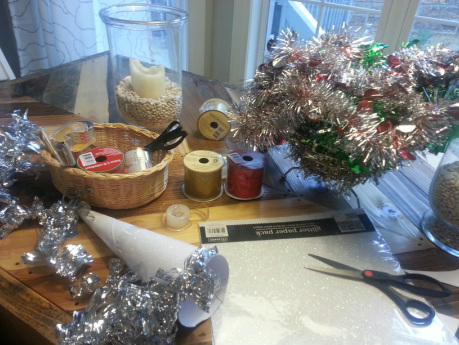
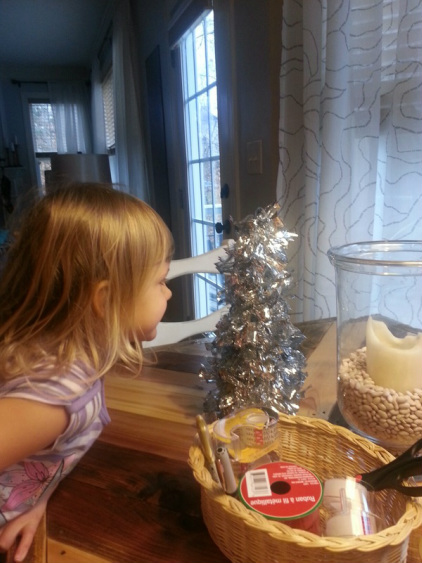
While we were waiting on our Mod Podge projects to dry, we whipped up a couple of cone trees. This is another quickie craft project that is super easy, and it's kid friendly.
Cone trees
Supplies:
- Construction paper or heavy stock paper (scrapbook paper works well!)
- Scissors
- Tape
- Double-sided tape (not a must, but can come in handy)
- Garland or ribbon
Instructions:
Step 1. Take a sheet of your heavy stock paper (or construction paper) and roll into a cone shape.
Step 2. Secure with tape so that it doesn't unroll.
Step 3. Trim excess paper with scissors so that your cone can rest flat--and level-- when standing upright.
Optional step: Wrap some double sided tape around the cone so that when adding your material, it is nice and secure.
Step 4. Take garland or ribbon and secure one end to the base of the cone with tape.
Step 5. Wrap it around the cone (making sure to adjust the material to tighten up any gaps), winding it up to the top and then cut with scissors.
Step 6. Tuck loose end in under last wrapped row.
Step 6. Tuck loose end in under last wrapped row.
That's it--you're done! Like I said, quick and easy. You can also use some pretty wrapping paper, trimming (like a string of pom-poms) or fabric to cover your cone to create trees of different textures and looks. Just keep in mind that with fabric or trimming you will need a few dabs of hot glue instead of tape. Create a nice display by grouping cone trees of varying heights or finishes. You can really have fun with this.
Ella was so proud of her tree. She wanted to call her grandma on Skype right away so that she could show it off. I think she placed it in about 7 different spots before finally deciding where it should go. She was just so excited. What a cutie patootie.
Ella was so proud of her tree. She wanted to call her grandma on Skype right away so that she could show it off. I think she placed it in about 7 different spots before finally deciding where it should go. She was just so excited. What a cutie patootie.

 RSS Feed